To install a font on macOS, you can follow these steps:
- Download the font file: You can download the font file from a website or copy it from a storage device.
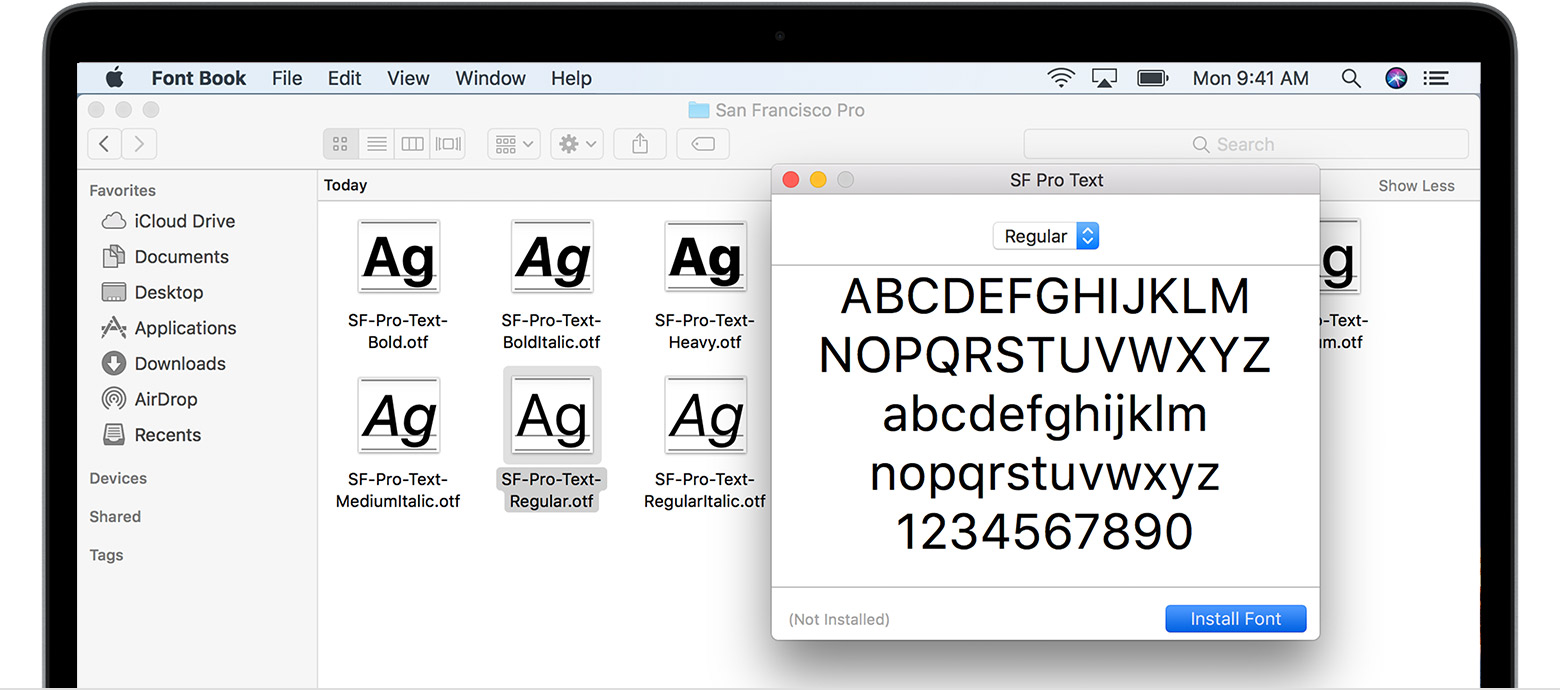
- Double-click the font file: This will open a preview of the font.
- Click the "Install Font" button: This button is located at the bottom of the preview window.
- Authenticate: If you are prompted to enter your administrator username and password, do so to allow the font to be installed.
- Wait for the font to be installed: This may take a few seconds or more, depending on the size of the font file.
- Check that the font is installed: You can confirm that the font is installed by opening an application that uses fonts, such as Pages or TextEdit, and checking if the font is listed in the font selection menu.
That's it! Your font should now be installed and available for use in any compatible applications.